PiDP-11: A Raspberry PI-based Replica of the PDP-11 Computer
- Author: Lukas Charvat
- Published: 7/10/2023
- Tags: #pdp11 #rpi #soldering #retrocomputing

In the world of computing, some machines hold a special place in history for their groundbreaking contributions. Without any doubts, the PDP-11 computer belongs to this group as an iconic device that revolutionized the way we interact with technology. Thanks to its rich legacy and enduring popularity, it is no wonder that enthusiasts want to recreate this gemstone of vintage computing. One of them is Oscar Vermeulen who came up with the PiDP-11 project on his site Obsolescence Guaranteed.
The PiDP-11 Project
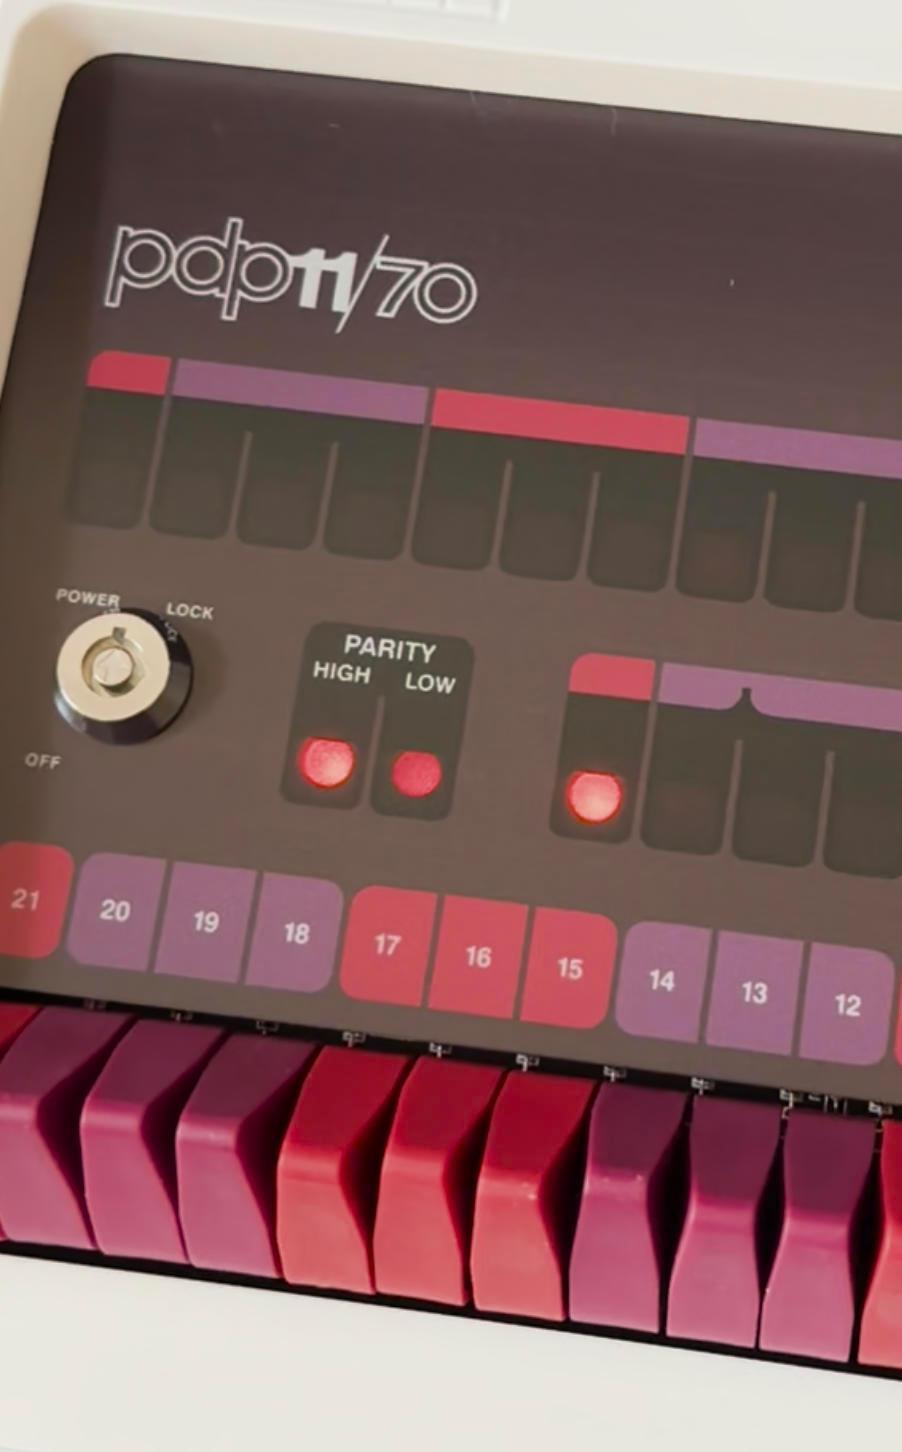
This project aims to resurrect the classic PDP-11 computer and its iconic blinkenlights. The kit shrinks the original down to about two-thirds size, while precisely recreating the look with an accurate case and switches. As the project's name hints, a Raspberry Pi (Pi 2, 3, or 4 recommended) powers the nostalgia by running a customized SIMH emulator with BlinkenBone support to connect the vintage simulator to the blinkenlight panel.
While not mandatory, the lights and switches really make for a complete vintage PDP-11 experience.
The light panel and switches are not actually required to run the PiDP-11, since the Raspberry Pi and SIMH emulator are sufficient. While not mandatory, these aesthetic touches connect you to the feel of using the original hardware in a way software alone cannot match.
Hardware Assembly
Close friends gifted me a PiDP-11 kit, ready for me to piece together. While my soldering experience was limited to basic model train repairs, the chance to build a PDP-11 replica and dive into retro computing was too tempting to pass up. Soldering up all the switches and LEDs is the tricky part, but the kit includes handy frames to align everything perfectly. With the clear instructions on the project site, I managed to complete the full build in around six hours.
The completed PiDP-11 circuit board lights up with 64 flashy LEDs, two turny knobs, and a row of unique switches hooked up to the Raspberry Pi's GPIO. A customized build of the SIMH emulator lets the Raspberry Pi accurately handle input and output from the panel. You can link up a display through Pi's HDMI, utilize SSH, or take it old-school with an RS-232 connection. The board has custom cutouts for all these connection options.
Software Installation
The PiDP-11 requires a 32-bit version of the Raspberry Pi OS. I choose common Raspbian without GUI. Other than that, the basic set up is quite straightforward. In short, you are expected to set up your Pi where it is successfully connected to the internet and the default user is named pi. Then, one just needs to install the pidp11 software:
# Create pidp working dir
sudo mkdir /opt/pidp11
cd /opt/pidp11

# Get and extract install package
sudo wget http://pidp.net/pidp11/pidp11.tar.gz
sudo tar -xzvf pidp11.tar.cz

# Perform the installation itself
sudo /opt/pidp11/install/install.sh
Now, you can continue with the download of the operating systems (including BSD 2.11, Unix V7, or DOS-11):
cd /opt/pidp11
sudo wget http://pidp.net/pidp11/systems.tar.gz
sudo tar -xzvf systems.tar.gz
The SIMH emulator runs within a screen program session. In the default configuration, after the RPi reboots and a user logs in, you will find yourself in the PDP-11 boot menu (if your OS is set up to boot into the command line). Otherwise, one needs to open a terminal window and enter ./pdp.sh to grab the terminal of the already running PDP-11 (in the case of booting into the GUI). This also applies when one leaves screen program session using CTRL+a and d.
Booting OS on PiDP-11
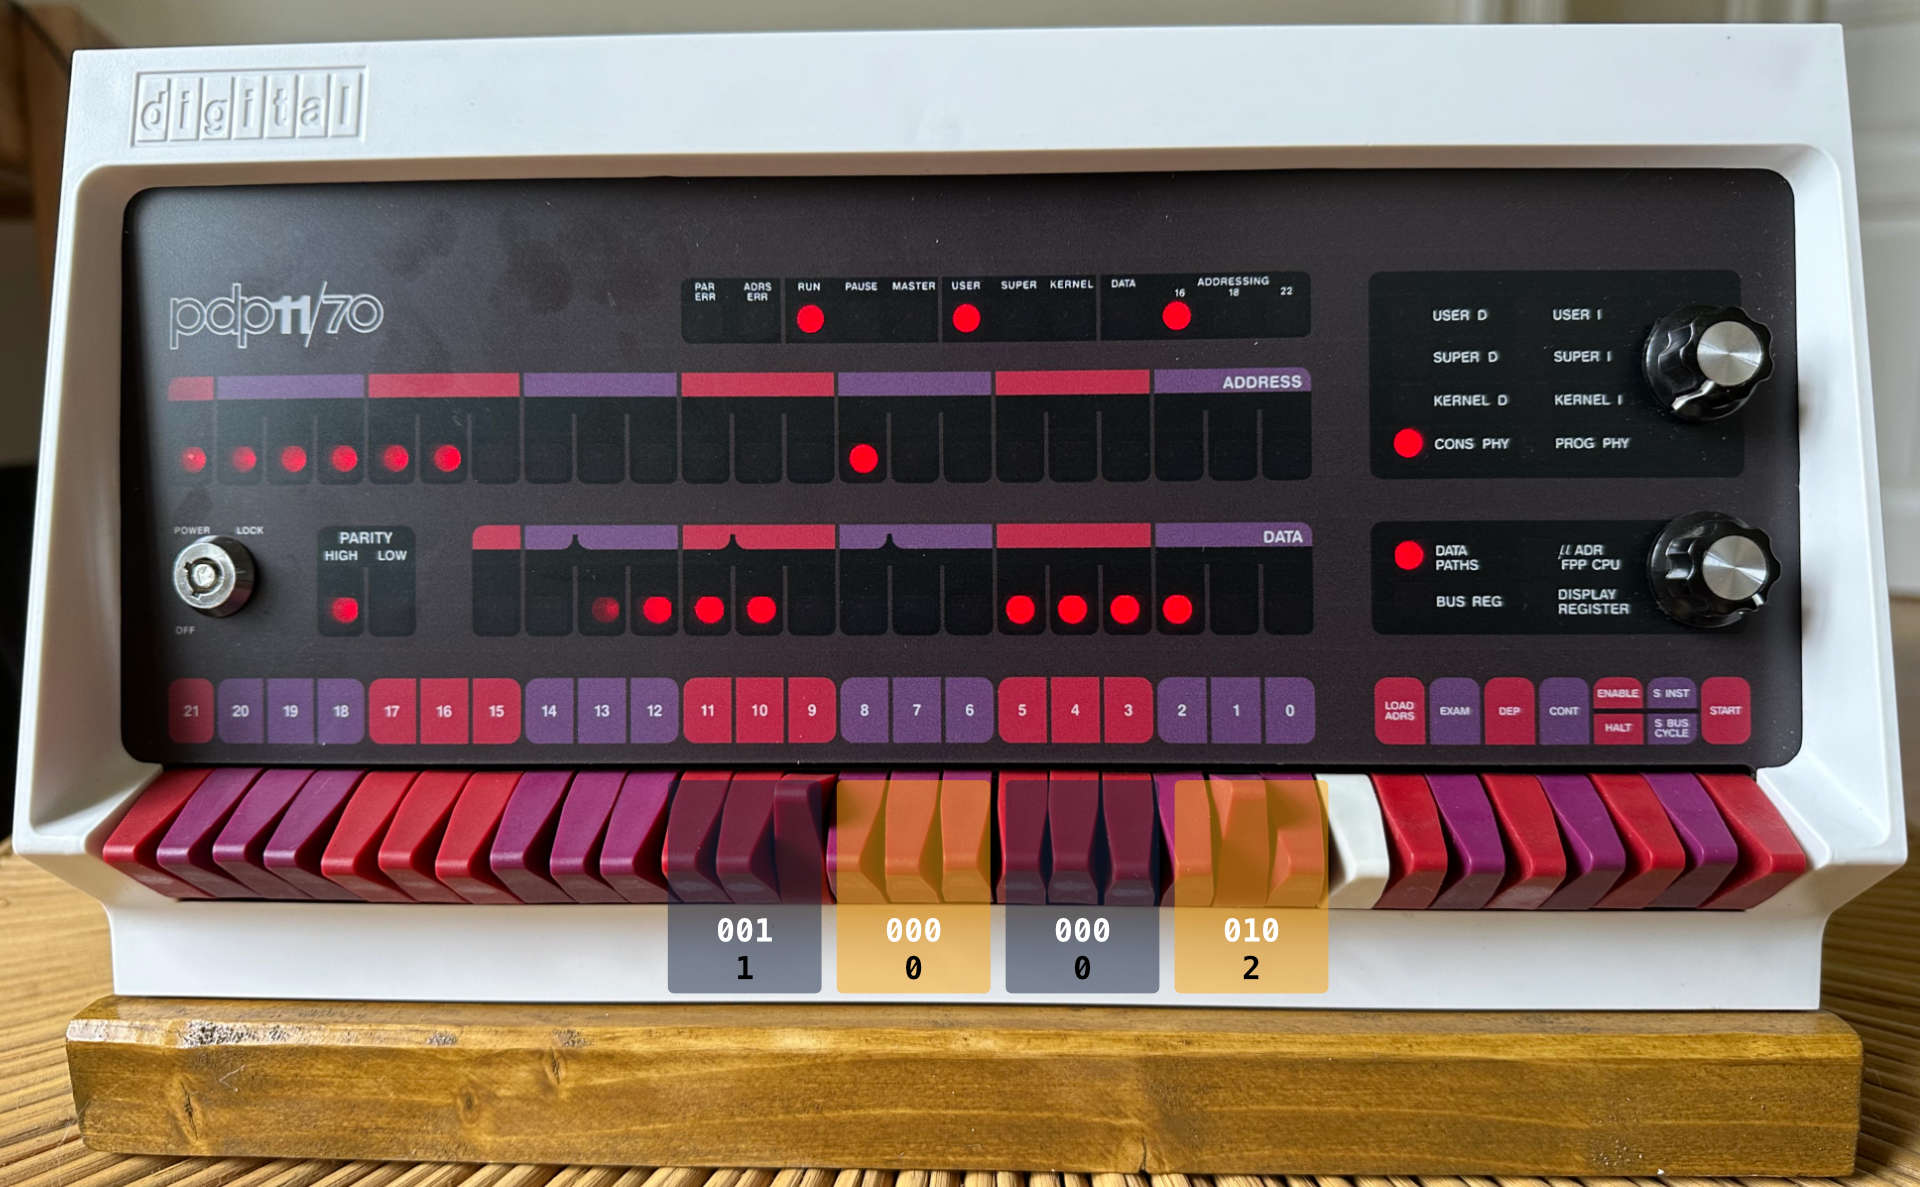
When powered on, the PiDP-11 starts up in a mini demo called IDLED that makes the Blinkenlight flash by running a tiny PDP-11 app. You can toggle an octal value on the SR switches (e.g., 1002 for blinky demo or 0102 for BSD 2.11) and press the Address dial to boot into any of the installed operating systems. If you only ever use one OS, you can set the SR switches to skip IDLED next time and go straight to your system of choice on power up.

In the above figure, one can see the configuration of SR switches to run blinky demo application. The app is listed as 1002 in the boot menu, thus one has set switches as follows 001 - 000 - 000 - 010.
Hello World C Program in BSD 2.11
Personally, from the available operating systems, I had the most fun with BSD 2.11. The PiDP-11 defaults to booting into single user mode, then you hit CTRL+d to go multi-user. However, on the first run, and ideally every 5 boots after, you should perform a disk check. Just boot to single user as usual until you see this prompt:
erase, kill ^U, intr ^C
#
Now, execute a full check using fsck program and let it scrub the disks.
fsck -p -t scratch
After a short while, the message or similar should be displayed.
/dev/ra0a: 64 files, 2812 used, 5012 free
If everything is fine or was fixed automatically, the # prompt will appear and you can now go into multi-user mode (by pressing CTRL+d). Once you get there, login as user root (without any password).
At last, it is time to compile our first Hello World on BSD 2.11 in vi editor! You can edit files without using vi directly in old-school BSD (e.g., by uploading the file from other PC to your Pi via SSH or FTP instead), but any enthusiast will surely start up vi editor. Just create and switch to some working directory (e.g. /root/hello), then start editing hello.c using vi:
#include <stdio.h>

int main()
{
    printf("Hello, World!\n");
    return 0;
}
Compile the code with cc compiler, run the ./a.out executable, and you have printed your first "Hello, World!" from a Pi-powered PDP-11:
cc hello.c
./a.out
Hello, World!
Conlusion
Oscar Vermeulen pours his passion into PiDP-11 (and PiDP-8) kits -- from the top-notch casing to the extensive labeling on the circuit board. Plus, you can easily switch back to Raspbian whenever needed. Since SIMH emulator does not tax the Raspberry Pi much, the PiDP-11 can likely handle other server jobs too. I guess that many users have their PiDPs pulling double duty as file or media servers. With the loving attention to detail, flexibility, and nod to computing history, the PiDP-11 is a must-buy for anyone fascinated by old-school tech.
References
- The PiDP-11 Project: Description of the project and assembly instructions.
- BSD 2.11: Additional reading material for BSD 2.11 version prepared specifically for PiDP-11.